Panasonic Lumix DMC-LX3 Review
Review Date: August 12th 2008
Author: Mark Goldstein
Leave a comment about this Review
|
Introduction
The Lumix DMC-LX3 is the third compact digital camera from Panasonic to offer a 16:9 ratio image, following on from the original LX1 model that was released back in 2005 and the LX2 in 2006. The Panasonic LX3 additionally offers more conventional 3:2 and 4:3 ratio images via a switch on the lens barrel. Other improvements on the Panasonic DMC-LX3 include a brand new 10 megapixel, 1/1.63-inch CCD sensor, Venus Engine IV image processor, 3.0-inch LCD screen with a 3:2 aspect ratio and 460K dot resolution, and extended ISO range (80-3200). The Panasonic LX3 also has a wealth of options that will appeal to the more serious photographer. It features a 2.5x, 24-60mm wide-angle lens with a bright maximum aperture of F/2.0 at the 24mm setting, optical image stabilizer, full range of manual exposure controls, compact all-metal body, 2.5fps continuous shooting and support for both JPEG and RAW image formats. Panasonic have certainly made some bold claims about the LX3, stating that it offers "the highest image quality in compact camera history". And with a hefty price-tag of �399 / $499.95, you'd expect the LX3 to be near the mark. So does the Panasonic Lumix DMC-LX3 significantly improve on the popular LX2 model, and is it the right compact digicam for you? Carry on reading the World's first online review to find out...
Compare Prices
Support PhotographyBLOG: Buy the Panasonic Lumix DMC-LX3 from one of our affiliate retailers:Ease of Use
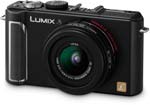
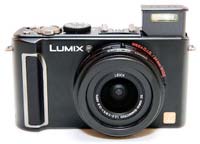
The Panasonic DMC-LX3 is a handsome yet understated camera, available in a choice of shiny silver or more serious black. It's a fairly compact camera, although it is wide (over 10cms) and more importantly quite deep too. The specification claims that the LX3 is 27.1mm deep, but this doesn't take the lens into account. The true depth is actually 45mm, which means that whilst the LX3 is still pocketable, it's a tighter squeeze than the official figures suggest, and therefore more at home in a small camera bag than in a pocket. The LX3 is extremely well-built, with a high quality all-metal body and controls.
The overall design is dominated by the lens on the front and the large 3 inch LCD screen on the rear. The built-in flash is particularly neat. It pops up out of the top of the body when you open it, and then is stored safely away by pushing it back down. Panasonic have also added a flash hotshoe, which as you'd expect accepts either an optional flashgun, or more unusually the External Optical Viewfinder (more on this later). Another neat feature is the joystick, which allows you to set apertures and shutter speeds, control manual focusing and access the Quick Menu. It's an innovative idea that speeds up using the camera, which Panasonic now feature on a number of other models. Slight negatives in terms of build quality include the cover for the battery compartment and SD card slot, which feels a little insubstantial and is locked using a cheap plastic switch, and the tripod socket is positioned in the bottom-left corner of the camera, which doesn't make it very stable on a tripod.
The DMC-LX3 has an unusual wide-angle, 2.5x zoom lens, which provides a focal length equivalent to 24-60mm on a 35mm camera. The 24mm wide-angle lens makes this one of the more versatile compacts in terms of focal range, especially as it is coupled with Panasonic's Mega O.I.S system, which helps to ensure that the majority of photos taken in good light are sharp. If you're used to a standard 3x zoom lens which usually starts at around 35mm wide, then you will find that the lens on the DMC-LX3 provides an entirely new angle of view that can only increase your creativity. Take it from me, you won't want to go back to a "standard" zoom after using the 24mm lens on the LX3.
Things are a lot more limited at the telephoto end, though, with the 60mm setting providing an angle of view that's very similar to our normal vision (50mm is usually quoted as the equivalent setting). Therefore you'll have to physically move closer to your subject to capture head and shoulder portraits, with more extreme close-ups obviously out of the question. Some people will view the LX3's 2.5x lens as a backwards step from the previous LX2, which offered a 4x zoom covering a more versatile 28-112mm focal length, and it's certainly an important factor if you're considering the LX3.
On a more positive note, the maximum aperture at wide-angle is a very bright f/2.0, increasing to a still very respectable f/2.8 at full telephoto. This is a step-up from the f/2.8 lens on the LX2, and much, much better than the lenses on most compact cameras. The new f/2.0 lens is about twice as bright as the previous f/2.8 lens, which means that the LX3 can be used to shoot at higher shutter speeds or in lower-light conditions, and still achieve comparable results. It also helps to blur the background more and concentrate the focus on the main subject of the photograph.
The DMC-LX3 joins the handful of Panasonic compacts to offer advanced controls over exposure, with full manual, aperture and shutter priority modes on offer, which will appeal to the more experienced photographer looking for a pocket alternative to their DSLR. The icing on the cake is support for the RAW format, which makes the LX3 a real contender in this respect. You can choose to shoot in RAW only, or RAW plus one of the two JPEG modes, giving you the best of both worlds. Shutter speeds range from 60-1/2000 seconds, and apertures from F2.0 - F8.
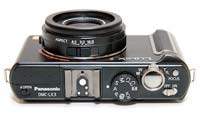
The Lumix DMC-LX3 is one of the most complex Panasonic compacts in terms of the number of external controls that it has, with nearly 20 in total. Found on the top of the camera are the small on/off switch, Focus button which lets you quickly select the number of auto focus points in the frame, responsive push/pull zoom lever and the large, tactile shutter button. There's also a traditional dial on the top of the camera that lets you select the different exposure modes; Program, Aperture Priority, Shutter Priority, and Manual. This dial is a typical feature of SLR cameras, and enables you to quickly change between the various modes. The various Scene modes, Intelligent Auto and the Movie mode are also accessed via this dial. Additionally there are to custom modes, C1 and C2, which allow you to configure your favourite settings and quickly access them.
 |
 |
| Front | Rear |
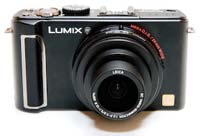
On the bottom of the camera is the metal tripod socket and battery / SD card compartment, and on the right side are three connection ports, including the new Component Out socket for connecting the LX3 to a HD television or monitor. Unfortunately, Panasonic have decided to cut costs and not include a component cable as standard in the box, which means that you'll have to purchase one separately to take advantage of this camera's HD connectivity. The most unfamiliar controls are found on the lens barrel. The Focus switch lets you choose between normal auto-focusing, macro and manual focusing. The latter option works quite well, although it is a slow process. The centre of the LCD screen shows a magnified view, with a vertical distance scale on the right. You use the joystick to select a certain distance to achieve sharp focus.
The other control on the lens barrel is the all-important Aspect Ratio switch, which allows you to select the type of image that you want to record. 16:9 is the same as wide-angle televisions and produces a very effective panoramic effect. If you're a fan of cameras like the Hassleblad xPan series, the Panasonic Lumix DMC-LX3's 16:9 mode is quite similar and will definitely appeal to you. Note that when compared to the previous LX2, Panasonic have changed the way that the LX3 handles aspect ratios. 16:9 images are now recorded at 9 megapixels, 3:2 images at 9.5 megapixels and 4:3 images at the full 10 megapixels. Also, the switch to a 3:2 aspect ratio LCD screen from the 16:9 screen on the LX2 means that the camera blacks out the top and the bottom of the screen to represent the 16:9 and 4:3 views, a similar system to the original LX1 model. The ability to switch between different viewpoints makes the Panasonic Lumix DMC-LX3 a very adaptable and creative tool, especially if you have an interest in panoramic images. The new Multi-aspect bracketing mode makes this even easier, allowing you to shoot an image in all 3 aspect ratios simultaneously.
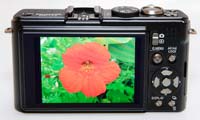
The rear of the LX3 has changed slightly when compared to the LX2. There's a new Camera / Play switch, which enables you to quickly and easily switch from shooting to playback. This system does have one drawback though, in that you have to keep switching between the shooting or playback modes, rather than just pressing a button to review your images whilst in a shooting mode, as on most other digital cameras. The AF/AE Lock button has been moved down next to the Quick Menu joystick and underneath the thumb grip area, a more logical position than before. Pressing the joystick accesses the Quick menu system, which provides quick access to most of the principal controls, including ISO speed, image size, image quality and white balance (there are up to 9 settings in total, depending upon the current shooting mode). You can still access all of these options from the main menu system too.
Optical image stabilisation, which could previously be turned on and off via an external button, is now only accessible through the DMC-LX3's menu system. This isn't really a problem in practice, as I left it turned on for 99% of the time without negatively affecting the battery life. Otherwise the LX3 is very similar to the LX2, with a traditional D-Pad with 5 buttons, and Display and Burst Shooting buttons underneath. Pressing left, up, right and down on the D-Pad buttons selects self-timer, exposure compensation, flash and function options respectively. The Function button can be configured to activate one of seven key settings - I chose ISO speed. In shooting mode, the Display button alternates between showing no information, gridlines and the main camera settings.
The main menu system on the Panasonic Lumix DMC-LX3 is straight-forward to use and is accessed by pressing the Menu/Set button in the middle of the navigation D-Pad. There are two main menus, Record and Setup. Most of the camera's main options, such as white balance, image quality, auto-focus mode and ISO speed, are accessed here, so the Record menu has 22 options spread over 4 screens, and the Setup menu has 26 options over 5 screens. As mentioned previously, the addition of the Q.Menu button on the rear of the camera speeds up access to some of the more commonly used options. Due to the large LCD screen and restricting the number of on-screen choices to five, the various options and icons are clear and legible.
The large 3 inch LCD screen is the only way of framing your shots, so if you have to have an optical viewfinder, look elsewhere now (although you can buy the optional External Optical Viewfinder which slots into the flash hotshoe), but I found that the new 460K pixel, high-resolution screen coped admirably with the majority of lighting conditions. This screen is a great improvement on the TZ3's, even being nice to use in low-light. The Auto Power LCD function automatically detects the current lighting conditions and boosts the LCD backlighting by up to 40% when shooting outdoors in bright sunshine, helping to keep the screen visible. The various icons used to represent the camera settings are clear and legible. If you have never used a digital camera before, or you're upgrading from a more basic model, reading the easy-to-follow manual before you start is a good idea. Thankfully Panasonic have chosen to supply it in printed format, rather than as a PDF on a CD, so you can also carry it with you.
 |
 |
| Top | Pop-up Flash |
In a throwback to the days before digital took over the world, the LX3 offers a Film Mode with 6 colour types and 3 types of monochrome to choose from. This applies to both JPEG and RAW files, so you can effectively shoot a black and white RAW file, for example, out of the camera if you wish (although I'm not sure why you'd want to...). As you select a different Film Mode, the effects can clearly be seen on the LCD screen. In addition, you can change the contrast, sharpness, noise reduction and saturation levels for each one, and even create 2 custom modes of your own. The Multi Film option takes up to three consecutive images using different Film Mode settings (this doesn't work in RAW mode though). The Intelligent Exposure mode automatically adjusts the contrast and exposure of the scene to compensate for big differences between the main subject and background, with Low, Standard and High settings on offer, whilst Multiple Exposure lets you combine 2 or 3 separate images for creative effect.
First introduced on the DMC-FX55 camera, the DMC-LX3 features an enhanced version of Intelligent Auto Mode. Panasonic have tried to make things as easy as possible for the complete beginner by providing this shooting mode, which allows you to point and shoot the camera without having to worry about choosing the right mode or settings. Intelligent Auto Mode automatically determines a number of key criteria when taking a picture, including selecting the most appropriate scene mode (from 5 commonly used presets) and ISO speed, and turning face detection (up to 15 faces), image stabilization and quick auto-focus on. The Intelligent Auto Mode now includes Intelligent Exposure, which increases exposure only in the under-exposed areas of the image, and Digital Red-eye, which automatically detects and removes red-eye. Intelligent Exposure can also be turned on in the Normal Picture mode (but strangely not Digital Red-eye).
In practice the Intelligent Auto Mode system works very well, with the camera seamlessly choosing the most appropriate combination of settings for the current situation. The 5 available scene modes are Portrait, Landscape, Macro, Night Portrait and Night Scenery, so obviously not all situations are covered by Intelligent Auto Mode, but it does work for the majority of the time. It makes it possible for the less experienced photographer to easily take well-exposed, sharp pictures of people, scenery and close-ups by simply pointing and shooting the camera. Also catering for the beginner are a total of 23 scene modes, including new Pin Hole and Film Grain modes that add unique, film-camera-like effects to your images (quirky rather than useful).
The HD video capability of the DMC-LX3 is one of the major new features of this model. The HD movie mode records 720p video at 1280x720 pixels at 24 fps. Selecting this mode is a little more awkward than it should be, as you have to first select the 16:9 aspect ratio on the lens barrel and then the HD picture mode. Movies are saved in the Quicktime .MOV format, which is fine for the smaller sizes, but less so for the HD video - our 17 second sample movie is a whopping 55Mb, and you'll only be able to fit around 10 minutes of HD footage on a 2Gb SD card. Panasonic would have been better advised to employ a more efficient video codec. On a more positive note, sound is recorded during capture (although as with most digicams it's on the muffled side). Back to the minus points though, as you can't use the zoom lens during recording, although this does avoid the continuous auto-focusing problem that afflicted the DMC-TZ5's movies. I also didn't notice any of the thin white vertical lines that appeared during both shooting and video-playback in the TZ5's movies.
As with all current Panasonic models, the LX3 has an anti-shake system, dubbed Mega O.I.S. Turn it on via the Record Menu and the Panasonic Lumix DMC-LX3 automatically compensates for camera shake, which is a slight blurring of the image that typically occurs at slow shutter speeds when the camera is hand held. There are three different modes, Mode 1 is on all the time including image composition, Mode 2 is only on when you press the shutter button, and there's also an Auto mode. In practice I found that it does make a noticeable difference, as shown in the examples on the Image Quality page. You don't notice that the camera is actually doing anything different when anti-shake is turned on, just that you can use slower shutter speeds than normal and still take sharp photos. Thankfully leaving the anti-shake system on didn't negatively affect the battery-life, with the camera managing just over 350 shots using the supplied rechargeable Li-ion battery (50 shots more than the LX2).
Panasonic also provide a High Sensitivity mode to help combat the effects of camera shake. When this scene mode is selected, the camera automatically raises the ISO speed from 1600 up to a maximum of 6400 and therefore allows for a faster shutter speed. This mode allows you to handhold the DMC-LX3 without using the flash and get more natural results, whilst at the same time freezing subject movement more successfully. There are some obvious drawbacks with this special scene mode, principally a significant reduction in resolution to a maximum of 3 megapixels in the 4:3 aspect ratio, and the Quality is also set the the lowest level. The user guide states that "you can take pictures suitable for 4x6 inch printing" using the High Sensitivity mode. You also need to select the right scene mode and therefore have some idea about when it is applicable to your subject.
 |
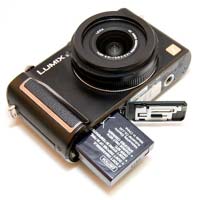 |
| Memory Card Slot | Battery Compartment |
The Intelligent ISO mode is the third way in which the DMC-LX3 attempts to avoid subject blur in low-light conditions. The camera automatically sets the appropriate shutter speed AND ISO speed for the subject that you are taking pictures of. So if you're taking shots of a child indoors, the DMC-LX3 automatically raises the ISO and in turn the shutter speed to avoid blurring the child's movement. If the subject is still, then the camera chooses a lower sensitivity and slower shutter speed. It's a clever idea that works well in practice, with the camera generally choosing an appropriate combination of shutter and ISO speed. You can also limit the maximum ISO speed that the camera can choose, which I'd strongly advise, as the fastest available setting of ISO 1600 produces very noisy images - ISO 800 is a better choice.
The Extra Zoom feature from earlier Lumix models has been retained, which basically works by digitally increasing the zoom from 2.5x up to a maximum of 4.5x by only using the central part of the image. To achieve that increase, though, a smaller image size has to be selected by the user. Choosing the 3 megapixel mode means that you can zoom up to 4.5x, whilst 5 megapixel provides a 3.6x zoom, and 7 megapixel is 3x (all in the 4:3 aspect ratio). Fairly useful if you don't mind the decrease in resolution, but you do have to set the camera to the right picture size before the extra zoom function works, and it only works when shooting JPEGs. It would have been a much better system if the camera intelligently increased the zoom and then decreased the size of the image. When activated, EZ is displayed next to the horizontal zooming scale.
Panasonic have obviously noticed the success that Ricoh have been enjoying with their high-end, system compact cameras, because at the same time as announcing the LX3, they also unveiled a number of optional accessories (Panasonic UK sadly didn't send any for us to review). There's a Wide Conversion Lens, which widens the view even further from 24mm to 18mm, and the External Optical Viewfinder, which slots into the flash hotshoe and is useful if you prefer to hold the LX3 up to your eye for image composition. There's also a compact external flashgun with a guide number of 22, although obviously you can't use the flashgun and the optical viewfinder at the same time. Finally, ND. MC, and Polarizing filters (which in turn require an optional lens adaptor) can also be purchased, which leaves a Wide Conversion Lens as the only notable absentee (I'd expect to see one made available sooner rather than later). Panasonic are obviously hoping that buyers will turn an initial �399 / $500 purchase into something greater by gradually adding to their LX3 "system".
The start-up time from turning the Panasonic Lumix DMC-LX3 on to being ready to take a photo is fairly quick at around 1.5 seconds. Zooming from the widest focal length to the longest is a lot slower though at over 3 seconds (I'm not sure why zooming just 2.5x takes so long). Focusing is quick in good light and the camera achieves focus most of the time indoors or in low-light situations, helped by the focus-assist lamp. The camera doesn't have any problems locking onto the subject in low-light situations. The visibility and refresh rate of the 3 inch LCD screen are very good, and the pixel count of 460,000 is excellent, with virtually no visible grain. It takes about 1 second to store a JPEG image, allowing you to keep shooting as they are being recorded onto the memory card - there is a barely perceptible LCD blackout between each image. Storing a single RAW image takes around 5 seconds, but thankfully it doesn't lock up the camera in any way - you can use the menu system or shoot another image while the first file is being written to memory. The Panasonic Lumix DMC-LX3 has a pretty standard Burst mode which enables you to take 2.5 frames per second for up to 4 images at the highest JPEG image quality or 3 RAW images (there is a much faster 6fps high-speed mode, but the resolution drop to just 3 megapixels). Overall the Panasonic Lumix DMC-LX3 is about average in terms of operational speed.
Once you have captured a photo, the Panasonic Lumix DMC-LX3 has a good range of options when it comes to playing, reviewing and managing your images. You can instantly scroll through the images that you have taken, view thumbnails (up to 30 onscreen at the same time and in a special Calendar view), zoom in and out up to 16x magnification, view slideshows, delete, protect, trim, resize, copy and rotate an image. You can also select favourite images, sort images into categories, change an image's aspect ratio, add a text stamp, add a soundclip and set the print order. The new Leveling option automatically corrects a picture in which the subject is leaning to the left or right, rotating the image to straighten it and cropping the edges. Dual Play is a great option that takes advantage of the big LCD screen by allowing you to compare two images onscreen at the same time. The Display button toggles detailed settings information about each picture on and off, such as the ISO rating and aperture / shutter speed, and there is a small histogram available during both shooting and playback. When taking a photo, pressing the Display button toggles between the detailed information, the detailed information plus gridlines to aid composition, and no information at all.
In summary, the Panasonic Lumix DMC-LX3 is an unusual, well-made, feature-rich yet easy-to-use camera that caters for both beginner and more experienced photographers alike.
|
![]() PhotographyBLOG
is a member of the DIWA
organisation. Our test results for the Panasonic Lumix DMC-LX3 have
been submitted to DIWA
for comparison with test results for different samples of
the same camera model supplied by other DIWA
member sites.
PhotographyBLOG
is a member of the DIWA
organisation. Our test results for the Panasonic Lumix DMC-LX3 have
been submitted to DIWA
for comparison with test results for different samples of
the same camera model supplied by other DIWA
member sites.