Fluid Mask 3 Review
Review Date: April 23rd 2008
Author: Jon Canfield
Leave a comment about this Review
Introduction
Extracting parts of an image in Adobe Photoshop has never been especially easy. It usually involves multiple selections, deleting, creation of complex masks, and at least in my case, plenty of Undo commands. It has become easier with the latest releases of Photoshop though. The Extract tool does a very good job and reduces the pain quite a bit. Still, there are other options. Third party plug-ins for extracting objects have been popular for quite a while now. Tools like Mask Pro, EZ Mask, PriMatte, and KnockOut are some of the most commonly used. All have their strengths, and all have a similar but distinct way of creating cutouts. Recently, I started using Fluid Mask 3 from Vertus Software (www.vertustech.com). With both a plug-in and a stand-alone application, Fluid Mask stands out from the other available tools by not only being easier to use and learn, but also by doing an extremely good job of edge detection and blending to create cleaner selections.
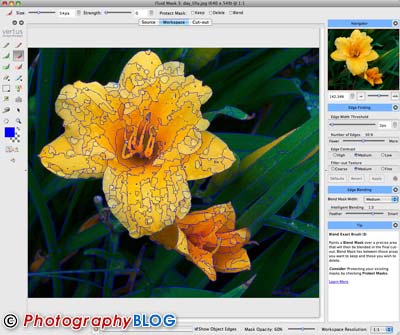
Figure 1
Ease of Use
Fluid Mask is started like any other plug-in. With the image open in Photoshop, select Filter > Vertus > Fluid Mask (or by launching the application if you're not using Photoshop). Version 3 has a cleaner look with a well-designed window. The tool palette on the left is docked by default, but you can turn it into a floating palette if that works better for you. On the left side of the window you'll see a navigator and options for how edges are handled, including how wide an edge needs to be and how to blend edges. Finally, below these controls is a context sensitive Tip section that shows info on the tool in use, or the tool you move the mouse over.
When you start Fluid Mask, it will analyze the image to find and select edges. From this point, you'll paint the areas of your image for keeping and deleting. The green tools select areas to keep, and red selects the areas to delete. There are three different tools available depending on how precise you need to be with your selections. The Pencil brush (top) do an exact selection – any pixel you touch will be masked. The Local brush (middle) will mask entire segments - those areas enclosed by the edge detection. Finally, the Global brush (bottom) will mask similar segments anywhere they're found in the image.
Figure 2
With each brush type, you have options to control the size. The local and global brushes can also have the Strength modified to control how far selections grow beyond the immediate segment. Finally, the Protect options control whether a brush stroke can affect an already masked area – so, you can protect a keep mask you've already made while using the delete brushes as an example. The final brush is the Blend brush. This brush is useful for areas like hair and other fine details that would be almost impossible to mask otherwise.
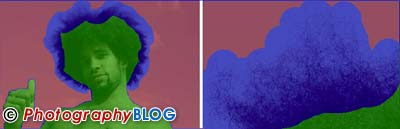
Figure 3
For even more control, the Patch tool is available. By creating a patch in a specific area of your image, you can set edge finding and blending options that will be constrained to that area only.
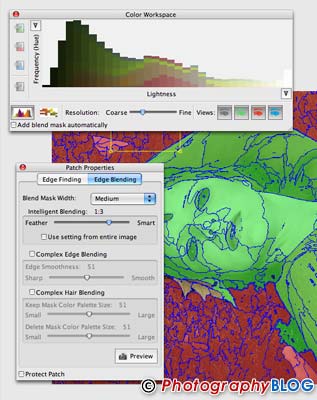
Figure 4
Other tools include a Force Edge which lets you manually create an edge where needed, Color Sampler which selects specific colors within a image, the Clean tool to eliminate holes in a mask, and the Eraser tool to remove masks from the image.
Most useful in my work though is the Preview cut-out tool. Rather than rendering the entire mask, this lets you preview a smaller area of the image to see how your mask is shaping up.
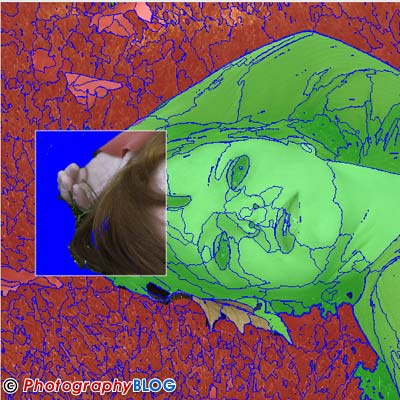
Figure 5
If you're a Photoshop user, all the normal keyboard shortcuts are available [ and ] change brush size, space changes to a hand to move around, Ctrl (Mac Cmd) + and – zoom in or out.
Once your mask is created, you'll need to create the Cut-out. You can see the results of your cut-out in the workspace, and if everything looks good you can apply and save your changes which will open the image in Photoshop with the mask applied. For complex images that take more time than you have, or for common tasks such as studio shots against a green screen, you can save your project and come back to it later by selecting Load Project.
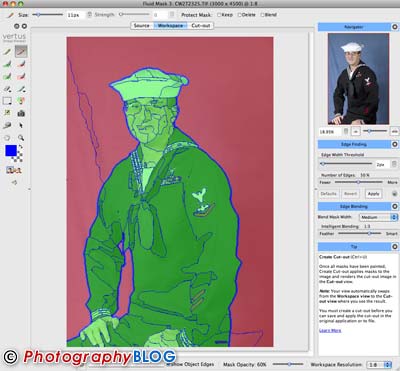
Figure 6
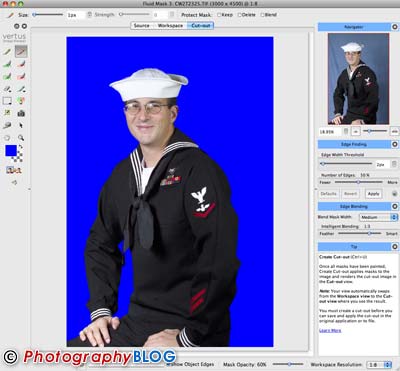
Figure 7
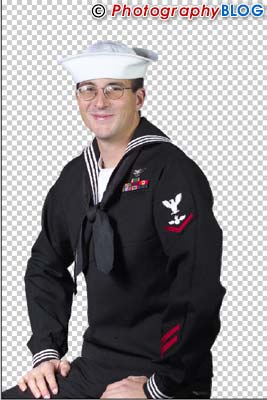
Figure 8
Conclusion
| |
|
|
Ratings (out of 5) |
|
| Features | 4.5 |
| Ease-of-Use | 4 |
| Value for Money | 3.5 |
Masking still takes some work, but Fluid Mask 3 certainly makes the process much easier than before. Although not inexpensive at Ł159 / $239 / €209, if you spend much time at all creating masks, Fluid Mask 3 will pay for itself in short order and is well worth the investment.