Epson Stylus Pro 7880 Review
Review Date: March 6th 2007
Author: Jon Canfield
Leave a comment about this Review
Introduction
The Epson UltraChrome K3 series printers are a well known and popular choice for many digital photographers that are looking for quality prints with a good archival life. In fact, it's probably a safe bet to say that the Epson printers such as the R2400 and Stylus Pro large format printers have sold more units that the other companies combined. So, when Epson asked if I'd like to take a look at their new 24� Stylus Pro 7880, I was very interested in seeing what they had improved.
The UltraChrome K3 ink set is pigment based, with a total of nine inks: Photo Black, Matte, Black, Light Black, Light Light Black, Cyan, Magenta, Yellow, Light Cyan, and Light Magenta. With the exception of the Stylus Pro 3800, only Photo Black or Matte Black can be installed at any one time. Changing between the two inks requires flushing the ink lines and wastes a considerable amount of ink (as much as $75 worth on a 24� printer).� Because the new 3800 has all nine inks on board, I had high hopes that the new line would follow suit. The good news is that Epson is clearly moving in that direction. The bad news is that it's only in the newest 64� model, the Stylus Pro 11880. If your needs and budget are more modest, you'll still be swapping blacks on the 17� 4880, 24� 7880, and 44� 9880.
So, what changed then? Outwardly, nothing looks different on the new printers. Epson sent a 24� Stylus Pro 7880 for review, but these comments apply to the 4880 and 9880 as well. There is still the same layout with four ink cartridges on each side of the printer, and the control panel has the same button layout as before. Roll feed is done in the same manner as before with a simple vacuum feed system to hold the paper flat during printing. The only obvious changes are the addition of an Ethernet port as standard equipment, replacing the FireWire port in the previous models, and in the inks. Epson has replaced Magenta and Light Magenta with Vivid counterparts. These new vivid magenta and vivid light magenta inks extend the color gamut in the blue and purple ranges (Figure 1). As an example, this image is now able to print all the blues and magentas going into purple with the new inkset, while previously the blues in particular showed clipping.

Figure 1
Compare Prices
Support PhotographyBLOG: Buy the Epson Stylus Pro 7880 from one of our affiliate retailers:Setup
Like any pro series printer, these babies are big. Don't plan on unpacking and setting it up all on your own. Even the Stylus Pro 4880, which can sit on a table, is best handled by two people, but once you get into the larger sizes, you absolutely need two or more to get the printer assembled and on the included stand (the 7880 weighs in at about 110 lbs). You should plan on about an hour and a half to unpack and assemble the printer, including ink installation. It's a straight-forward process thanks to excellent documentation.
Once you have the stand assembled, you're ready to put the printer on the stand and begin charging the ink lines. The LCD control panel walks you through each step of the process, making it nearly foolproof to setup. The Stylus Pro 7880 ships with Photo Black ink only. If you plan to do much fine art printing, I suggest you buy a Matte Black cartridge at the same time as the printer, and install that during the initial setup. Remember that each time you switch between Matte and Photo Black, you need to flush the ink line, consuming expensive ink in the process.
After setup, you'll install the software for your system. Epson includes drivers, a network configuration program, and utilities to update firmware and manage paper, and to perform maintenance like nozzle cleaning. These are all accessed through the Epson Printer Utility (Figure 2).
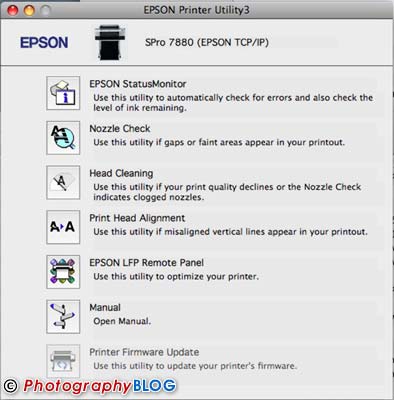
Figure 2
If you're on a Mac running Leopard (10.5), you'll need to go to the Epson website (http://www.epson.com/leopard) to download updated drivers.� The default drivers have very limited options � you can't select paper types, color management settings, or other critical options until you update your drivers, so make this your first stop.
Ease of Use
Printing to the Stylus Pro 7880 is very much like any other Epson printer you might have used. If you're printing from Photoshop, you should let Photoshop manage color (Figure 3), and select the appropriate paper profile there.
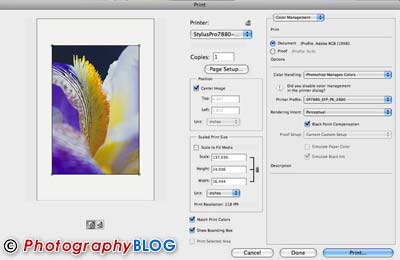
Figure 3
In the print driver, be sure to select No Color Management to avoid unexpected results, and note that if you're on a Mac that there is a new option, 16 bit color, that promises to improve output by sending more color information to the printer, resulting in more accurate color and smoother tonal transitions. Windows users will need to wait until Vista supports 16 bit printing to take advantage of this feature (Figure 4).

Figure 4
There are three quality settings for output that are suitable for photo printing � Fine, at 720dpi, SuperFine at 1440x720, and SuperPhoto at 2880x1440. In general, I found that SuperFine is a good choice for general printing, while SuperPhoto is used for final exhibition quality prints. Moving up to SuperPhoto doubles the print times and uses significantly more ink, so I reserve this for times when the output quality is critical.
One area that I think Epson handles better than most is paper feed. The 7880 has three paper paths � roll, cut sheet tray, and straight. The straight path can handle media up to 1.5mm thick, like posterboard.
Overall, I found the Epson Stylus Pro 7880 to be slightly faster in printing than the previous model, outputting a 16x20 print in the SuperFine mode in just under 7 minutes.� The same print in SuperPhoto mode takes about 13 minutes. The new print heads have an improved screening algorithm that Epson calls AccuPhoto HD Screening (Figure 5) that improves dot placement to produce much smoother tones. Combined with the variable dot size, the final prints look very much like a continuous tone print. Compared to prints from the 7800, tonal transitions are visibly improved, especially in areas like sky, or skin tones.
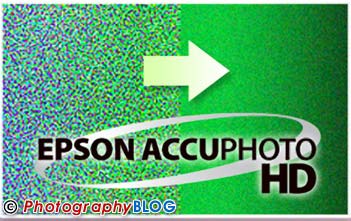
Figure 5
Black and white printing has also been improved with a higher dmax than the previous generation of printers. Epson claims a dmax of up to 2.55 on Epson Premium Luster Photo Paper. Part of this improvement is due to the way Epson is encapsulating the inks. An additional benefit to the new encapsulation is reduced bronzing and metamerism and improved scratch resistance.
As before, the Advanced Black and White mode (Figure 6) is available to produce neutral or toned prints using all three black inks while minimizing the amount of color ink used in the print. Output in this mode is very good and one nice feature is the ability to fine tune a print for just the toning effect you're looking for.
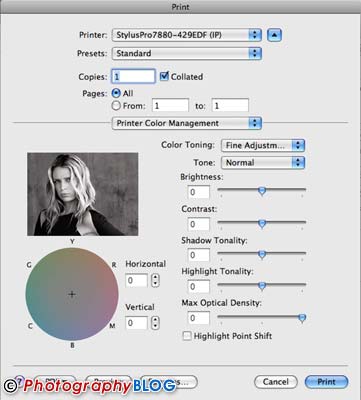
Figure 6
I printed to a number of different types of paper, including fine art photo rags, traditional RC papers, and the new baryta based papers all with excellent results. Out of the box the profiles supplied by Epson are exceptionally accurate. I also had the opportunity to try some of the new Epson Exhibition Fiber paper. While certainly not cheap, the prints from this combination are stunning to view � I'd rate them as among the best output I have ever seen from an inkjet printer. I'll have a detailed look at this new media in a future article.
In looking closely at the difference the new Vivid Magenta inks make in printing, I did a number of landscape and flower shots. Purples and blues are visibly more detailed than before and exceed those of the Canon and HP printers with dedicated blue inks. Even compared to the previous Epson magenta inks, the color gamut is extended well beyond what was previously capable (Figure 7). As you can see from the chart in Figure 7, some color range has been lost in the greens and cyans, but in normal printing these colors are very seldom seen.
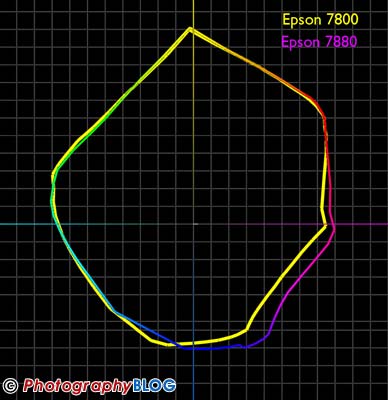
Figure 7
Conclusion
| |
|
|
Ratings (out of 5) |
|
| Design | 4.5 |
| Features | 4.5 |
| Ease-of-Use | 5 |
| Image Quality | 4.5 |
| Value for Money | 4 |
The new x880 series from Epson, based on the Stylus Pro 7880 that I tested, brings some nice enhancements to the digital photographer interested in high quality output. If you own a 4800, 7800, or 9800, you may not see a reason to upgrade at this time unless the extended gamut is critical for you. For those contemplating a large format printer, the new Epson's are an excellent option. Print quality, support, and paper handling are all top notch. The only real drawback is the requirement to swap blacks when switching between media types. If this doesn't apply to you, both the Stylus Pro 7880 and the Epson x880 series in general are hard to beat.
Leave a comment about this Review